I bought the Soundcore Liberty 5 Pro earbuds at an Anker store in Tokyo, which made the purchase a little more memorable than ordering another pair online.
After spending time with them, there is a lot I genuinely like. The sound quality is excellent, they fit comfortably, the microphone performs very well, and the active noise cancellation is especially effective in loud environments like the gym.
Unfortunately, there is one issue that keeps me from recommending them without qualification: a noticeable hissing or background noise when ANC is turned on.
Watch My Soundcore Liberty 5 Pro Review
In the video, I share my full experience with the earbuds, show the case and controls, and explain why the ANC issue is so frustrating.
Buying the Liberty 5 Pro in Tokyo
I picked these up while visiting Tokyo, Japan at an Anker retail store. Buying tech in Tokyo is always fun, and it gave this pair of earbuds a little extra personal connection for me.
Did I need another pair of earbuds? Probably not. But apparently walking into an Anker store in Tokyo makes that decision easier.
Sound Quality and Fit
The Liberty 5 Pro sound very good out of the box. Music has plenty of detail and bass, while voices remain clear. The Soundcore app also gives you EQ and customization options if you want to fine-tune things.
The fit has also been excellent for me. They feel secure without creating uncomfortable pressure, which makes them especially useful during workouts.
Microphone and Call Quality
The microphone has been one of the biggest surprises. I’ve asked people how I sound during calls, and the feedback has consistently been very positive.
Some earbuds sound great for music but struggle with voice calls. In my experience, the Liberty 5 Pro does both well.
The Charging Case Is Excellent
The charging case is another standout feature. The design feels premium, and the integrated display and controls make it feel like part of the product rather than just a place to store and charge the earbuds.
It’s not essential, but it’s one of the details that makes the Liberty 5 Pro feel more interesting than many competing earbuds.
Active Noise Cancellation: Excellent With One Big Catch
This is where my Soundcore Liberty 5 Pro review gets complicated.
The active noise cancellation itself is very effective. In a busy gym, it does an excellent job reducing music, conversations, ventilation noise, and general background sound.
But when ANC is enabled, I can sometimes hear a noticeable hissing or electronic background noise.
In loud environments it may be easy to ignore. In quieter situations, it becomes much more noticeable.
That is frustrating because when ANC is turned off, the earbuds sound great.
What I Like
Excellent sound quality
Comfortable, secure fit
Very good microphone performance
Strong ANC in loud environments
Excellent charging case design
Useful customization through the Soundcore app
What I Don’t Like
Hissing/background noise with ANC enabled
The issue is more noticeable in quiet environments
It undermines an otherwise excellent ANC experience
Are the Soundcore Liberty 5 Pro Worth Buying?
Overall, I really like the Anker Soundcore Liberty 5 Pro. They sound great, fit well, perform very well for phone calls, and are excellent for blocking noise in the gym.
The biggest question is whether the ANC hiss will bother you.
If you primarily use the earbuds with ANC disabled, there is very little I dislike. If noise cancellation is one of your main reasons for buying premium earbuds, however, this is something I think you should know about.
Final Thoughts
The Liberty 5 Pro is an excellent pair of earbuds with one frustrating flaw.
The sound, fit, microphone, case, and ANC performance are all strong. I just wish the noise cancellation worked without introducing that extra hiss.
If Soundcore can improve that issue, these become much easier to recommend.
If you own the Soundcore Liberty 5 Pro, let me know: Do you hear the ANC hiss, or has your experience been different?
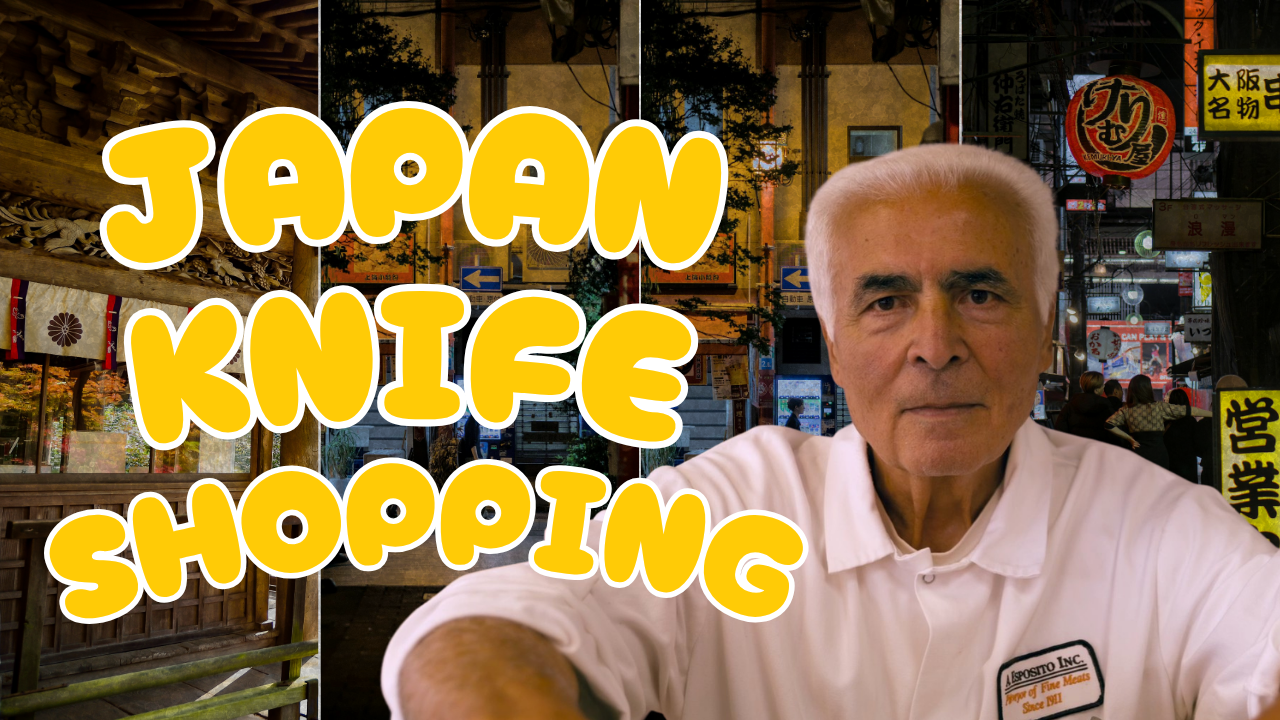
Buying a Japanese knife in Tokyo was one of the most personal missions of our Japan trip. My father, affectionately known as Mean Joe, spent his career as a butcher. He knows knives, uses them properly, and is not particularly easy to impress.
I did not want to bring him home a generic souvenir. I wanted to find a Japanese kitchen knife that he could actually use, have it engraved and hopefully receive the extremely rare Mean Joe seal of approval.
That search took us to Kappabashi, Tokyo’s famous kitchenware and restaurant-supply district.
Why Visit Kappabashi for a Japanese Knife?
Kappabashi Dougu Street is located between the Asakusa and Ueno areas of Tokyo. The approximately 800-meter shopping street contains more than 170 businesses devoted to cooking and the restaurant industry.
Although Japanese knives are a major attraction for international visitors, Kappabashi sells much more than blades. The stores offer cookware, ceramics, restaurant signs, commercial equipment, utensils, baking supplies and the realistic plastic food models displayed outside many Japanese restaurants.
The district felt more like a working commercial neighborhood than a polished tourist attraction. Restaurant professionals shop there, and many of the businesses specialize in very specific products.
That was part of what made Kappabashi interesting. We were not simply browsing another department store. We were walking through an area built around cooking, restaurant operations and traditional kitchen tools.
Choosing a Knife at Kamata Hakensha
After researching several stores, we visited Kamata Hakensha. The business began as a knife-sharpening shop in 1923 and has continued through four generations.
Because my father was a professional butcher, choosing the knife involved more than finding the most attractive blade. I needed to consider how he would use it, the knife’s balance, its weight and whether the handle would feel comfortable in his hand.
The staff helped us compare the available options and understand the differences between the knives. Having some idea of the intended use made that conversation much easier.
Once I selected the knife, Kamata added a personalized engraving. That transformed it from a useful kitchen tool into a gift created specifically for Mean Joe.
Japanese knives can be beautiful, but this was not intended to sit untouched in a display case. I wanted something my father would appreciate as a working butcher and continue to use at home.
Do Some Research Before Entering a Knife Store
Kappabashi’s knife stores can become crowded, and many of them are relatively small. During our visit, limited counter space was sometimes occupied by shoppers who had not researched the basic knife styles, asked extensive questions and then remained in the store without making a decision.
That can become frustrating for the staff and for customers who are ready to purchase something.
You do not need to become a knife expert before visiting. However, it helps to know:
How the knife will be used
Your approximate budget
Whether you want a multipurpose or specialized blade
Who will be using the knife
Whether the recipient can maintain a high-carbon blade
Whether you want engraving
Arriving with that basic information will help the store recommend an appropriate knife without turning the visit into a lengthy introductory lesson.
Kappabashi Is Cool, but Plan Your Breaks
I enjoyed Kappabashi, but the district was not especially convenient when we wanted to stop, eat or relax.
We found fewer obvious restaurants, cafés and public restrooms than expected. This is not an enclosed shopping center with a food court and bathrooms on every level. It is a long commercial street made up of individual specialty businesses.
My practical advice is simple:
Eat before arriving or choose a restaurant in advance.
Use a restroom before beginning your shopping.
Bring water during the warmer months.
Wear comfortable shoes.
Bring your passport if you plan to use tax-free shopping.
Confirm where any tax refund must be processed before leaving the area.
Kappabashi is worth exploring, but it is better approached as a focused shopping mission than as a neighborhood where you will casually spend an entire day relaxing.
Giving the Knife to Mean Joe
The real test happened after we returned home.
My father is famously hard to please, particularly when the gift involves a tool connected to his profession. He knows immediately whether a knife feels right and whether it is something he would actually use.
The video ends with me giving him the engraved knife and waiting for his reaction.
To my surprise, he appeared to genuinely enjoy it.
There was no exaggerated response or emotional speech. That is not Mean Joe’s style. However, his reaction was positive enough that I considered the mission a success.
For a man who spent his career handling knives and is not known for pretending to like things, that may have been the strongest possible endorsement.
Was Buying a Japanese Knife in Tokyo Worth It?
Yes. Buying a Japanese knife in Tokyo gave me a useful souvenir, a memorable shopping experience and a personal gift tied directly to my father’s career.
Kappabashi was one of the more interesting shopping districts we visited because it felt specialized and practical rather than designed entirely around tourists.
The stores can become crowded, and the area requires a little planning if you need food or a restroom. However, travelers who research their options and arrive with a clear purpose should have a much better experience.
Most importantly, the engraved knife managed to impress Mean Joe—or at least come as close to impressing him as anyone could reasonably expect.
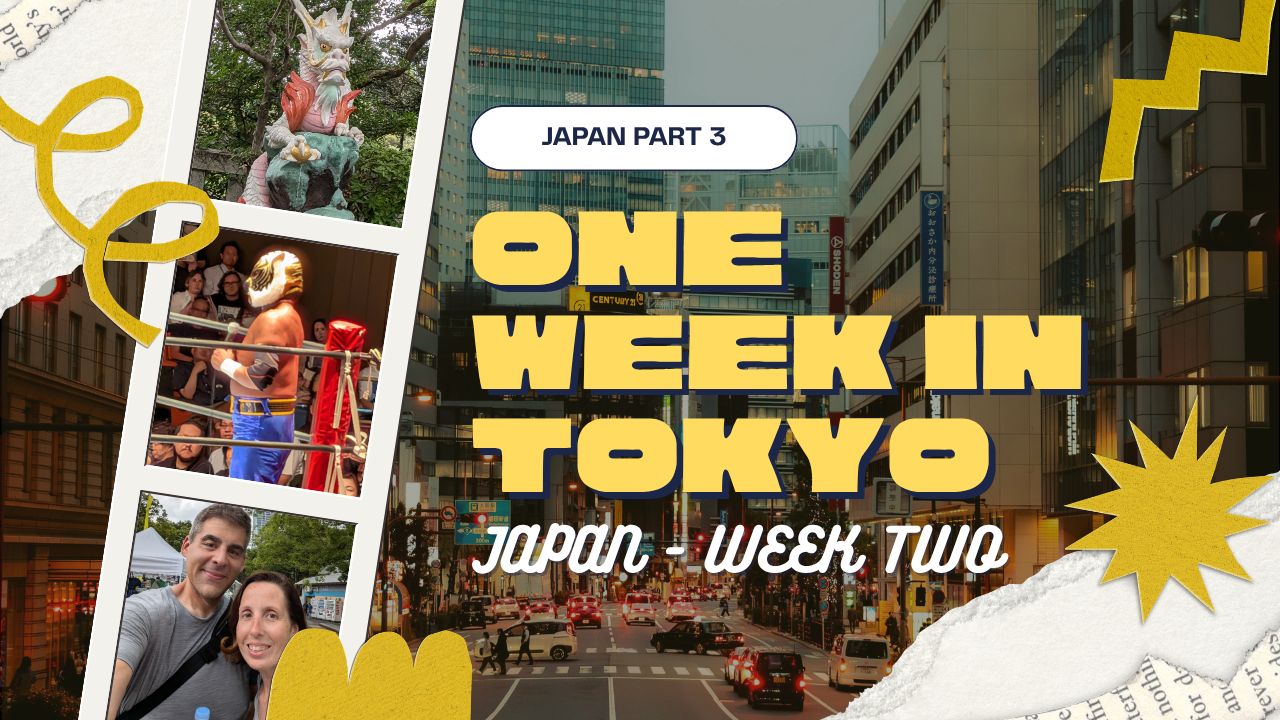
Our Tokyo travel itinerary was the longest and most varied part of our family trip through Japan. After visiting Osaka, Kyoto, Nara, Sapporo and the wider Hokkaido region, we spent nearly a week using Tokyo as our base.
During that time, we explored futuristic digital art, restaurant-supply stores, high-end shopping districts, historic gardens and a legendary professional wrestling venue. We also took day trips to Kamakura, Enoshima and Kawagoe.
Tokyo was surprisingly easy to navigate. The train and subway maps looked intimidating at first, but the system became familiar quickly. We occasionally used taxis when carrying luggage or large shopping bags, but public transportation handled almost everything else.
Not every famous attraction impressed us. In fact, my favorite day began with an accidental muddy hike outside the city. However, Tokyo provided the broadest mix of experiences from our entire Japan trip.
Arriving in Tokyo and Settling Into Our Rental House
Our first day in Tokyo followed the same pattern as our arrival days in Osaka and Sapporo. We traveled, collected our luggage, reached the rental house, unpacked and searched for dinner.
There was no major attraction that day. After moving between regions, everyone needed time to understand the new house and surrounding neighborhood.
The most memorable part of the evening was eating at a restaurant in Shinjuku that used a robot delivery system.
The robot carried food from the kitchen area to the table, allowing the human staff to focus on ordering, customer questions and other parts of the service. It was practical, but it also provided one of those futuristic moments many travelers expect to encounter in Japan.
After a full travel day, our first Tokyo meal was delivered by a robotic cat.
Day 2: teamLab Planets in Toyosu
Our first major Tokyo attraction was teamLab Planets in Toyosu.
Visitors remove their shoes and move through a series of rooms containing water, mirrored surfaces, projections, flowers and interactive digital artwork.
The opening water-based section was the strongest part of the experience for me. We walked barefoot through warm water while projected koi moved around our legs. The fish changed direction in response to the people in the room and transformed into flowers when they collided with visitors.
That section felt genuinely interactive rather than simply decorative.
Does teamLab Planets Look Better on Video?
After the water exhibit, my enthusiasm declined.
The other rooms looked visually impressive, but the crowds made it difficult to become fully absorbed in the experience. Even with timed admission, we waited in substantial lines and frequently felt aware of people taking photographs or moving into the next space.
Interestingly, the attraction looks fantastic in our footage. The mirrors, projections and lights appear dramatic once the surrounding noise and crowd management are removed.
That created a strange disconnect between the video and my actual memory of being there.
teamLab Planets may be one of those attractions that looks better on camera than it feels in person. I understand why people enjoy it, but the water section set a high standard that the later rooms did not match for me.
Ryan and the Fruit Vendor
Outside teamLab, Ryan stopped to speak with a local fruit vendor he had apparently met before.
I joked that there was no possible way the vendor remembered him. Ryan had been one customer among thousands of visitors passing through the area.
The vendor then appeared to recognize him.
Toyosu Senkyaku Banrai
After teamLab, we visited Toyosu Senkyaku Banrai, a food and shopping complex near Toyosu Market.
The property recreates the appearance of an Edo-period commercial neighborhood. Wooden-style façades, lanterns and narrow storefronts create a historical atmosphere even though the complex is modern.
Restaurants and food stalls focus heavily on Japanese seafood and dishes connected to Tokyo’s historic market culture. We found several good things to eat and enjoyed walking through the reconstructed streets.
This was easier to enjoy casually than teamLab. We did not have to interpret the attraction or wait for entry into another room. We could simply explore, find food and continue when we were ready.
Shibuya Shopping and an Unexpected Outdoor Market
Ryan wanted to visit Shibuya, while he and Ben were primarily interested in anime-related stores and merchandise.
Allison and I allowed them to shop while we explored the surrounding area. We unexpectedly discovered an outdoor market with food trucks, handmade items and small independent vendors.
The market felt relaxed and gave us a break from department stores and heavily promoted tourist attractions. We walked among the stalls, looked at the handmade products and watched food being prepared in the trucks.
This became another example of an unplanned activity being more enjoyable than something we had researched carefully.
Day 3: Shopping for a Japanese Knife in Kappabashi
The next day had a very specific mission: finding a quality Japanese kitchen knife for my father, also known as Mean Joe.
We traveled to Kappabashi-dōri, Tokyo’s famous restaurant-supply district.
Kappabashi is filled with stores selling:
Japanese knives
Cookware and kitchen tools
Plates, bowls and ceramics
Restaurant furniture and signs
Commercial kitchen equipment
Plastic replica food displays
The district serves restaurant professionals, but it has also become popular with travelers searching for Japanese knives, ceramics and practical kitchen souvenirs.
Kamata began as a knife-sharpening business in 1923 and has continued through several generations. The store carries a large range of Japanese and Western-style kitchen knives.
Choosing the knife involved more than selecting the most expensive or visually impressive blade. We considered its intended use, weight, handle and overall feel.
During our visit, the tax-refund process was not completed directly at the store. We had to walk several blocks to a separate refund counter with the purchase, passport and receipt.
Travelers making tax-free purchases in Kappabashi should ask exactly where the refund is processed before leaving the store.
Practical Kappabashi Travel Tips
Kappabashi is useful, but it is not a conventional shopping mall.
We found relatively few obvious places to eat or use a public restroom. Many businesses cater to professional buyers who already know what they need and are not planning to spend the entire day in the district.
Before visiting Kappabashi:
Eat before arriving or identify a restaurant in advance.
Use a restroom before beginning your shopping.
Carry water, especially during the summer.
Bring your passport if you plan to request tax-free shopping.
Research a few knife stores before arriving.
Ginza and the Tokyo Peak Design Store
After Kappabashi, we traveled to Ginza for higher-end shopping.
Ginza is known for luxury stores, major international brands, large department stores and polished flagship locations. We did not find anything especially compelling during our first visit, although we returned later in the trip.
One purposeful stop was the Peak Design store.
We purchased a new wallet for Ben and several packable bags. I also hoped to find a Tokyo-exclusive collectible pin from the store’s vending machine.
Unfortunately, the pin vending machine was no longer there during our visit.
I could buy the travel gear, but Tokyo had apparently decided that I was not getting another exclusive pin.
New Japan Pro-Wrestling at Korakuen Hall
That evening, we attended a New Japan Pro-Wrestling event at Korakuen Hall.
Korakuen Hall opened in 1962 and became one of Japan’s most important professional-wrestling and boxing venues. The building hosts hundreds of combat-sports events each year, including approximately 250 professional-wrestling shows.
The venue is much smaller than a modern arena. That compact design places the audience close to the ring and creates an energetic atmosphere.
I was already excited to attend a wrestling show in such a historic building. Then we discovered Hiroshi Tanahashi at the merchandise table.
Tanahashi is one of the most important wrestlers in NJPW history and currently serves as the company’s president. I could not believe that he was personally meeting fans and helping at the merchandise area.
Meeting him made the night even more memorable.
I was not permitted to film the wrestling itself, but the entire family enjoyed the show. Even family members who were not dedicated NJPW followers appreciated the energy and atmosphere inside Korakuen Hall.
Day 4: Our Favorite Tokyo-Area Adventure
Day four became my favorite day of the Tokyo portion of the trip, although most of it took place outside Tokyo.
We wanted to experience a Japanese beach, so we traveled into Kanagawa Prefecture and began the day in Kamakura.
The plan seemed simple: visit a temple, see a money-washing shrine, eat lunch and continue to the beach.
Instead, we accidentally turned the morning into a steep and extremely muddy hike.
Jōchi-ji was founded in 1281 and ranks fourth among Kamakura’s Five Great Zen Temples. Chinese monks helped influence its early design, which explains some of the Song dynasty architectural details found in its buildings.
The temple grounds were peaceful and wooded. The pathways, structures and cemetery blended naturally into the surrounding hillside.
Its main hall contains three Buddha figures representing the past, present and future.
We also walked through the cemetery. Unlike a large urban cemetery, it felt integrated into the forest and temple grounds rather than separated from them.
Jōchi-ji was not the largest religious site we visited in Japan, but its quiet atmosphere made it one of the more pleasant.
Our Accidental Muddy Hike
After leaving Jōchi-ji, we tried to reach the famous money-washing shrine.
I read a sign, noticed a group of Japanese hikers following a trail and assumed they were traveling in the same direction.
They were. Unfortunately, they had selected the hiking route rather than the easy paved approach.
The trail became increasingly steep, muddy and slippery. Recent storms had made the conditions worse, and we were wearing ordinary walking shoes instead of hiking equipment.
Everyone’s shoes became covered in mud. Bugs attacked us throughout the climb, and the family’s enthusiasm for my navigation decisions declined rapidly.
At several points, we continued mainly because the properly equipped hikers ahead of us appeared confident.
When we finally reached the shrine, we discovered that a normal paved road provided a much easier route.
The hike was awful. Fortunately, the destination was completely worth it.
According to tradition, Minamoto no Yoritomo founded the shrine in 1185 after the deity Ugafukujin appeared to him in a dream and revealed the location of a sacred spring.
The main entrance passes through a tunnel cut into the hillside. After walking through the rock, visitors emerge into an enclosed shrine complex surrounded by steep stone walls and trees.
The hidden setting made it feel as though we had discovered a sacred space inside the mountain.
Washing Money for Good Fortune
Visitors place coins or paper money into small baskets and wash them with water from the shrine’s spring.
Tradition says that money washed in the water may return or multiply through future financial good fortune. Another interpretation encourages visitors to spend the washed money rather than hide it permanently, allowing prosperity to continue circulating.
The activity gave everyone something active to do, but the shrine’s setting was more memorable to me than the promise of increased wealth.
I would gladly visit Zeniarai Benten again. I would simply use the paved road next time.
Lunch and a Japanese Beach
After the hike and shrine visit, everyone needed food and time to recover.
We ate lunch and continued toward the coast. Eventually, we reached the beach we had planned to visit from the beginning.
Fish were visibly jumping out of the water while we were swimming. After spending most of the morning covered in mud and bug bites, getting into the ocean felt like a reward.
Several local beach businesses offered paid showers, allowing us to clean up before continuing the day.
What began as a simple plan to see a beach had already included a Zen temple, a difficult hike, a shrine hidden inside a mountain and swimming among jumping fish.
We still had one more major stop.
Exploring Enoshima
After the beach, we continued to Enoshima.
The island combines narrow shopping streets, restaurants, ocean views, stairways and a large shrine complex spread across the hillside.
Enoshima Shrine traces its traditional origin to 552. The shrine complex includes three main sanctuaries:
Hetsumiya
Nakatsumiya
Okutsumiya
The sanctuaries honor three sister goddesses associated with the sea and safe travel. Enoshima is also closely associated with Benzaiten, a deity connected to water, music, art and good fortune.
Reaching the higher sections required additional uphill walking, which was not ideal after our accidental morning hike. However, we enjoyed the atmosphere enough to continue exploring.
The gradual climb through shopping streets and shrine buildings made Enoshima feel like a complete destination rather than a single landmark.
Our day began with the goal of seeing a Japanese beach. It ended with a temple, a muddy mountain trail, a money-washing shrine, ocean swimming and an evening exploring Enoshima.
It was easily my favorite day of the Tokyo segment.
Day 5: Imperial Palace East Gardens and Shopping
After the Kamakura and Enoshima adventure, the family needed a less demanding day.
We planned to focus primarily on shopping, but we began with a historical stop at the Imperial Palace East Gardens.
The Imperial Palace East Gardens occupy the former Honmaru, Ninomaru and Sannomaru areas of Edo Castle. They opened to the public in 1968.
Ninomaru Garden
Ninomaru Garden provided open space and a quieter atmosphere in the center of Tokyo.
The traditional Japanese garden includes a pond, carefully arranged plants and walking paths. It offered a sharp contrast to the department stores and crowded train stations surrounding the palace grounds.
The Foundation of Edo Castle’s Main Keep
We also visited the massive stone foundation known as the Tenshudai.
This supported the main keep of Edo Castle, which once symbolized the power of the Tokugawa shogunate. The keep was destroyed during the Great Fire of Meireki in 1657 and was never rebuilt.
The remaining stone platform helps visitors understand how enormous the lost structure would have been.
Shopping in Shinjuku, Harajuku and Ginza
The rest of the day focused on shopping in Shinjuku, Harajuku and Ginza.
We did not find anything life-changing, but we purchased gifts, clothing and several items to bring home.
The slower schedule was useful. Not every vacation day needs to involve a major attraction or complicated route. A dedicated shopping day gave everyone time to find personal items without trying to fit stores between temples and scheduled events.
Day 6: A Final Day Trip to Kawagoe
For our final full day in Japan, we traveled to Kawagoe in Saitama Prefecture.
Kawagoe is often called “Little Edo” because of its preserved warehouse-style buildings, old merchant streets and historical connection to Edo-period Tokyo.
Our main stops were Kawagoe Hikawa Shrine, Kashiya Yokocho and the Toki no Kane bell tower.
Kawagoe Hikawa Shrine
Kawagoe Hikawa Shrine has a history of more than 1,500 years and traditionally served as a guardian shrine for the surrounding area.
The shrine is particularly associated with relationships, marriage and forming strong personal bonds.
Its large torii gate stands approximately 15 meters high and creates an impressive entrance to the property.
By the final day of the trip, we were more familiar with shrine layouts and customs. We better understood purification areas, offering boxes, prayer plaques and the differences between smaller community shrines and enormous temple complexes.
Candy Alley and the Unexpected Butter Sandwiches
We also visited Kashiya Yokocho, commonly known as Candy Alley.
The confectionery district began developing during the Meiji era. After the 1923 Great Kantō Earthquake damaged many Tokyo candy producers, businesses in Kawagoe helped supply sweets to the capital.
At its peak, the alley reportedly contained around 70 candy businesses.
I expected old-fashioned hard candy and traditional snacks. I was not prepared for the butter sandwiches.
The butter sandwiches were rich, sweet and unexpectedly excellent. After spending much of the trip trying to maintain a low-carb diet, Candy Alley provided a serious test of my commitment.
Nobody warned me that butter sandwiches were waiting to destroy my diet.
Toki no Kane Bell Tower
The Toki no Kane bell tower is one of Kawagoe’s most recognizable landmarks.
The tower has announced the time in the city since the early Edo period. The current structure is the fourth version and was rebuilt after the Great Fire of Kawagoe in 1893.
The bell still rings four times each day:
6:00 a.m.
12:00 p.m.
3:00 p.m.
6:00 p.m.
The tower rises above the surrounding historic buildings and provided an appropriate final historical image for our Japan trip.
Conveyor-Belt Sushi and a Failed Godzilla Finale
After returning from Kawagoe, we ate conveyor-belt sushi.
Sushi was more interesting to the rest of my family than it was to me, but the ordering screens and moving dishes made the restaurant experience entertaining.
We then attempted to end the trip by visiting the famous Godzilla head in Kabukichō.
The Godzilla head is located on the Shinjuku Toho Building, which also contains Hotel Gracery Shinjuku. It can be viewed from the surrounding streets, while closer terrace access depends on the building’s current policies and operating hours.
We arrived too late and were turned away.
After nearly two weeks of bullet trains, temples, mountain lakes, hot springs, wrestling, beaches and historic towns, our final attraction involved someone telling us that we could not see Godzilla.
It was an underwhelming ending, but it was also a very honest way to finish a complicated trip.
Our Honest Impressions of Tokyo
Tokyo was the easiest enormous city I have ever navigated without a car.
The transportation network looks overwhelming on a map, but the individual trips become manageable once you understand the lines, station numbers and transfer signs.
We occasionally used taxis when we had luggage, were carrying many shopping bags or needed to preserve time and energy. However, trains and subways remained our primary transportation.
Tokyo Felt Like Several Different Cities
Each area offered a different atmosphere:
Toyosu: Modern, open and recently developed
Shinjuku: Dense, bright and energetic
Shibuya: Youthful, crowded and shopping-focused
Ginza: Polished, expensive and brand-oriented
Kappabashi: Practical, specialized and connected to working restaurants
Imperial Palace area: Quiet, historic and spacious
The day trips added even more variety. Kamakura offered temples and shrines, Enoshima combined ocean views with religious history, and Kawagoe preserved the atmosphere of an older commercial town.
Our Favorite Tokyo-Area Experiences
Best overall day: Kamakura, the beach and Enoshima
Favorite shrine: Zeniarai Benten
Best unexpected meeting: Hiroshi Tanahashi at Korakuen Hall
Best specialty shopping: Kappabashi
Most visually impressive on video: teamLab Planets
Best accidental discovery: The outdoor market near Shibuya
Best final-day food discovery: Kawagoe butter sandwiches
Worst navigation decision: Following hikers to Zeniarai Benten
Would We Recommend This Tokyo Travel Itinerary?
Yes, although I would make a few adjustments.
Our Tokyo travel itinerary combined modern attractions, shopping, historic sites, entertainment and several day trips. That variety prevented the week from feeling repetitive.
I would still visit teamLab Planets, but I would arrive with realistic expectations about the crowds. I would also continue to include Kappabashi, Korakuen Hall, Kamakura, Enoshima and Kawagoe.
Most importantly, I would preserve some flexibility. Several of our best moments came from activities we did not plan carefully, including the outdoor market, Ryan’s fruit-vendor reunion and parts of the Kamakura adventure.
Tokyo did not give us one single defining experience. It gave us restaurant robots, digital art, kitchen knives, professional wrestling, historic gardens, beaches, shrines and old merchant towns.
It was the part of Japan where we finally understood how many completely different experiences could exist within one region.
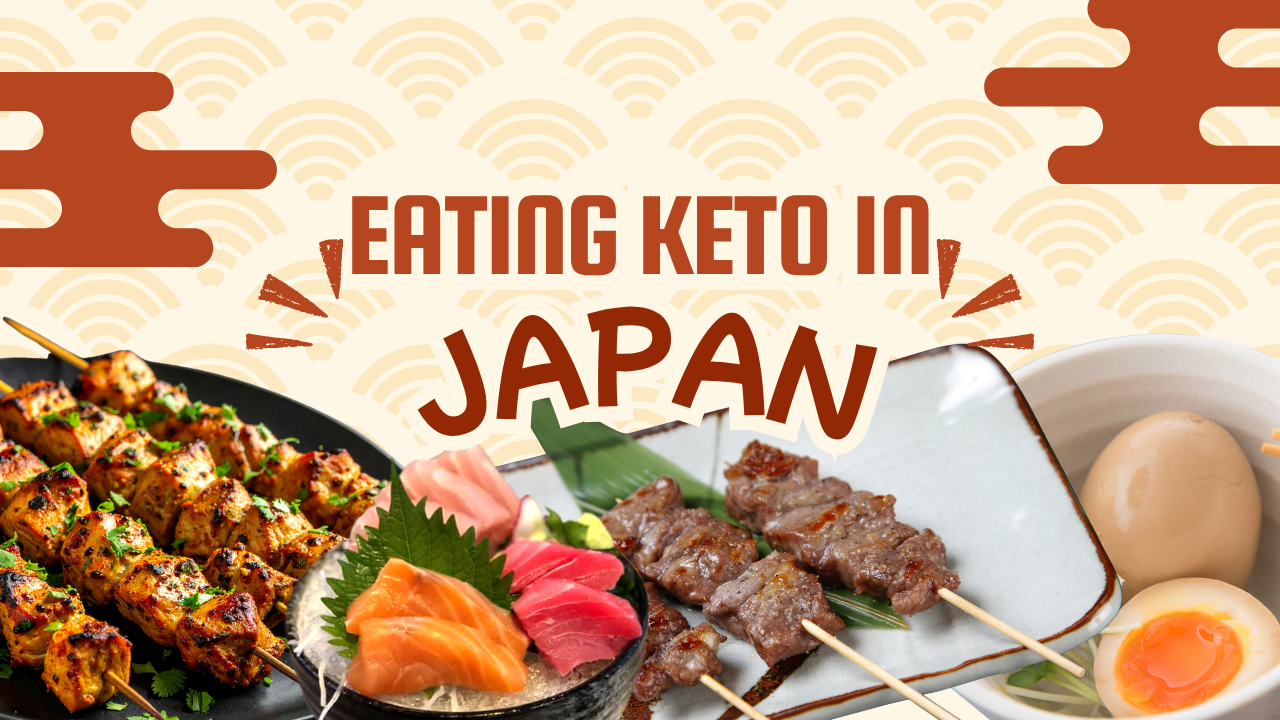
Eating keto in Japan was possible, but it was more complicated than I expected. Finding meat, eggs and other low-carb foods was rarely the problem. The real challenge was identifying small amounts of sugar hidden in sauces, marinades, prepared foods and dishes that appeared keto-friendly.
During our trip through Osaka, Hokkaido and Tokyo, I managed to maintain a mostly low-carb diet. Japanese convenience stores gave me reliable emergency options, while yakiniku and yakitori restaurants made it relatively easy to order grilled meat.
However, “not very sweet” did not always mean “no sugar.” I had to read labels, ask questions and accept that I would not have perfect information at every meal.
This article is based on my personal travel experience. It is not medical advice, and anyone who must avoid an ingredient for diabetes, allergies or another medical condition should confirm preparation methods directly with the restaurant.
Is Eating Keto in Japan Possible?
Yes. Japan has no shortage of meat, seafood, eggs, tofu and fresh vegetables. The difficulty is that many of those foods are served with rice, noodles, breading or sauces containing sugar.
Japanese food has a reputation for being healthy, but healthy and keto are not the same thing. A meal can include reasonable portions, fresh ingredients and relatively little processed food while still containing enough rice, sweet sauce or starch to make it unsuitable for a strict ketogenic diet.
I was able to remain mostly low carb by focusing on simple grilled meat and packaged foods with readable nutrition labels. I avoided trying to recreate my exact diet from home and concentrated on making the best available choice at each meal.
Low-Carb Foods at Japanese Convenience Stores
Convenience stores became one of my most reliable sources of low-carb food. Stores such as 7-Eleven, Lawson and FamilyMart were easy to find, stayed open late and sold individual portions that made it possible to build a simple meal.
Salad Chicken
Packaged “salad chicken” was probably the easiest option. This is a prepared chicken breast sold cold in the refrigerated section.
Plain and lightly seasoned versions were usually the safest choices. Some flavored varieties contained additional carbohydrates, so I still checked the label rather than assuming every package was identical.
Salad chicken was convenient, filling and easy to carry, although I eventually became tired of eating so much chicken.
Shio Chicken Skewers
I also looked for chicken skewers seasoned with shio, the Japanese word for salt.
Salt-seasoned skewers were generally a better low-carb choice than skewers coated with tare, the glossy sauce commonly used on yakitori. Tare often contains ingredients such as sugar, mirin and soy sauce.
However, “shio” does not guarantee zero carbohydrates in every prepared product. Packaged seasoning blends and marinades can still contain sugar or starch, so checking the label remains important.
Boiled Eggs and Other Simple Proteins
Plain boiled eggs and simply prepared meat could also work well. The key word is plain.
Prepared egg dishes were less predictable. For example, tamagoyaki is a rolled Japanese omelet that is commonly seasoned with sugar and soy sauce. The eggs themselves are low carb, but the finished dish may not be.
This was one of the recurring challenges: a food could look like an obvious protein choice while containing ingredients I would not have expected.
Lotte ZERO Chocolate
Lotte ZERO Chocolate became one of the few packaged sweets I regularly purchased.
It is labeled as containing zero sugar and zero sugars. However, that does not mean it contains zero carbohydrates.
The chocolate uses sugar alcohols and other sweeteners. Whether it fits your personal keto limits depends on your approach, portion size and response to those ingredients.
The larger lesson is that a product labeled “zero sugar” should not automatically be treated as zero carb.
Low-Carb Options at Yakiniku and Yakitori Restaurants
Yakiniku and yakitori restaurants provided some of my best restaurant options while eating keto in Japan.
Yakiniku
Yakiniku is a tabletop grilling experience in which diners cook individual pieces of meat themselves. It allowed me to concentrate on beef, pork and other proteins while skipping the rice.
The simplest cuts of meat were usually easier to evaluate than heavily marinated selections. Dipping sauces could contain sugar, so I used them cautiously or avoided them.
Yakiniku also worked well when traveling with family members who were not following my diet. Everyone could choose their own meat, sides and sauces without requiring the entire group to eat low carb.
Yakitori
Yakitori restaurants specialize in grilled skewers, commonly made with different cuts of chicken.
When possible, I ordered skewers with salt instead of tare:
Shio: Salt seasoning
Tare: A sweet and savory sauce that may contain sugar or mirin
Yakitori was one of the easiest ways to order several small portions of protein without receiving a large plate centered around rice or noodles.
As always, preparation varies by restaurant. Ordering shio reduced the likelihood of a sweet glaze, but it did not create an absolute guarantee that no sugar had been used.
Hidden Sugar Was the Hardest Part
The main obstacle was not resisting obvious desserts. It was identifying sugar in foods that did not look or taste particularly sweet.
Sugar can appear in:
Yakitori tare
Yakiniku dipping sauces
Teriyaki-style marinades
Tamagoyaki and other prepared egg dishes
Salad dressings
Pickled vegetables
Prepared meats
Soups and simmered dishes
Japanese cooking often balances salty, savory and sweet flavors. A small amount of sugar may be considered normal seasoning rather than something that makes a dish a “sweet food.”
That difference made communication difficult. When I asked whether a dish contained sugar, the answer was not always as clear as I hoped. A staff member might understand that I did not want a sweet dessert but not realize that I was asking about a small amount of sugar in a marinade.
This was not anyone being unhelpful. We were approaching the question from different perspectives.
Understanding Japanese Food Labels
Packaged products were sometimes easier than restaurant meals because I could examine the nutrition panel.
Three Japanese terms were particularly useful:
炭水化物 — Tansuikabutsu: Total carbohydrate
糖質 — Tōshitsu: Available carbohydrate excluding dietary fiber
糖類 — Tōrui: Sugars, a narrower category within carbohydrates
This distinction matters. A package may display 糖類ゼロ, meaning zero sugars, while still containing 糖質, or other carbohydrates.
I learned to look beyond the large “ZERO” wording on the front and check the complete nutrition panel on the back.
Translation apps helped, especially when using the camera function to translate ingredient lists. They were not perfect, but they were better than making a decision based entirely on packaging images.
Is It Rude to Leave Rice in Japan?
Before the trip, I found a great deal of online advice claiming that Japanese chefs would be offended if a visitor failed to finish everything on the plate, particularly the rice.
That was not my experience.
I sometimes received rice automatically as part of a set meal. When I politely explained that I avoided it for health reasons, nobody appeared angry or insulted.
Japan values politeness and avoiding unnecessary waste, but restaurant etiquette is not a rigid system in which every unfinished grain of rice creates a cultural incident. The Japan National Tourism Organization currently describes dining etiquette as relatively simple and advises visitors to follow the atmosphere of the restaurant.
The better approach is to request no rice when ordering, if possible. That avoids waste and removes the need to leave it untouched later.
A polite health-related explanation was generally understood. I would not recommend making dramatic demands or asking a chef to redesign a complicated dish, but requesting no rice was not a problem during my trip.
Useful Japanese Phrases for Low-Carb Travelers
These phrases can make ordering easier:
ご飯なしでお願いします。 Gohan nashi de onegaishimasu.
No rice, please.
たれではなく、塩でお願いします。 Tare dewa naku, shio de onegaishimasu.
Salt instead of sauce, please.
砂糖は入っていますか? Satō wa haitte imasu ka?
Does this contain sugar?
健康上の理由で糖質を控えています。 Kenkōjō no riyū de tōshitsu o hikaete imasu.
I limit carbohydrates for health reasons.
It may help to save these phrases as a screenshot. Showing written Japanese can be easier than trying to pronounce everything in a loud restaurant.
My Overall Experience Eating Low Carb in Japan
Eating keto in Japan was manageable, but it required more attention than I expected.
The country offered plenty of protein-based foods. Convenience stores, yakiniku restaurants and yakitori restaurants kept me from feeling as though I had no options.
The challenge was the small amount of sugar commonly added to sauces, marinades and prepared foods. Learning the difference between sugar-free and carbohydrate-free labeling was also important.
I did not find that restaurant staff became offended when I skipped rice or left it untouched. A polite explanation that I was limiting carbohydrates for health reasons was generally enough.
I would follow the same basic approach during another trip: rely on simple proteins, request salt instead of sweet sauce, read packaged-food labels carefully and accept that maintaining a perfect carb count may not always be possible.
Japan was not effortless for a keto traveler, but it was absolutely possible to make it work.
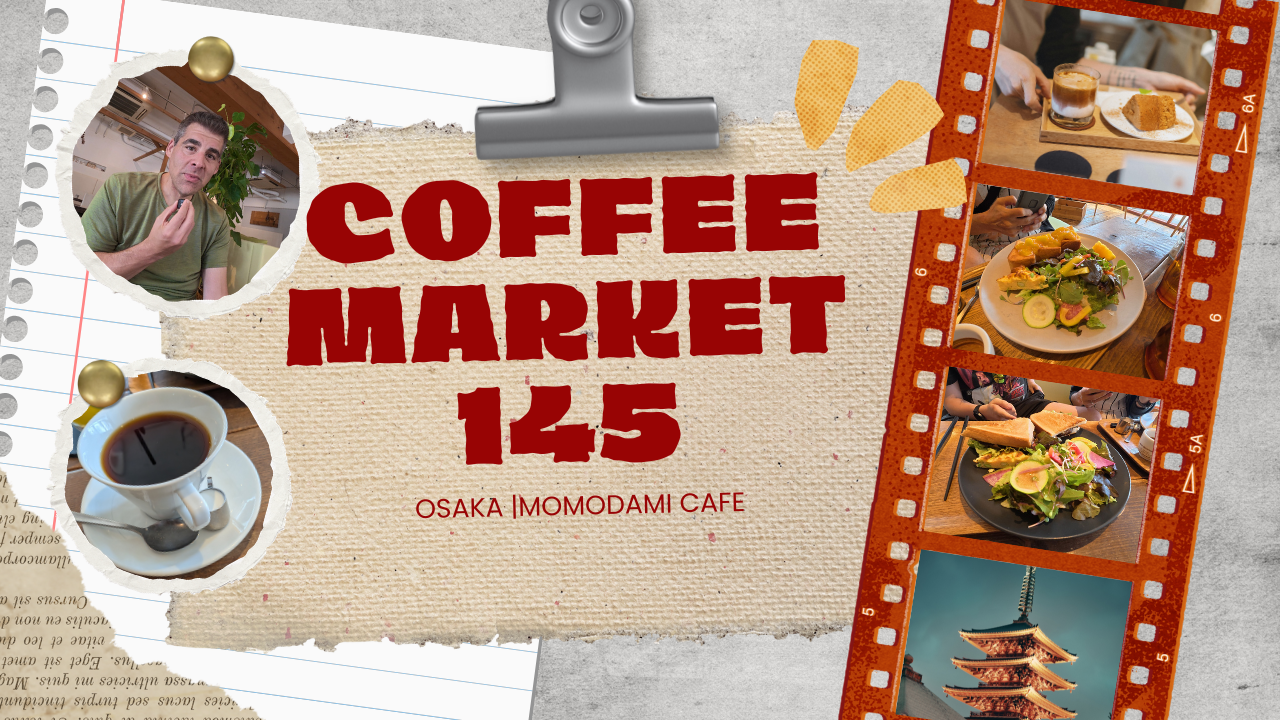
During our stay in Osaka, we discovered Coffee Market 145, a welcoming neighborhood café near Momodani Station. This Coffee Market 145 Osaka review covers the coffee, food, atmosphere and why the café became one of our favorite local discoveries during the first part of our Japan trip.
I had been struggling to find a cup of coffee that I genuinely enjoyed. Convenience-store coffee was convenient, and the familiar international chains were always available, but none of them were giving me the kind of coffee I wanted first thing in the morning.
Coffee Market 145 finally solved that problem.
The café opened early, the staff were friendly, Allison and Ben enjoyed their breakfast, and I was simply relieved to have what I considered a genuinely satisfying cup of coffee.
Where Is Coffee Market 145 in Osaka?
Coffee Market 145 is located in the Momodani area of Osaka’s Tennoji Ward. It is only a short walk from JR Momodani Station on the Osaka Loop Line, making it convenient for anyone staying in the surrounding neighborhood.
The café’s address is:
The Coffee Market 145
Elegant Life Dogashiba, 1st Floor
2-14-5 Dogashiba, Tennoji-ku
Osaka 543-0033, Japan
We were staying nearby in Osaka’s Korea Town area, so Coffee Market 145 was easy to reach in the morning. It felt like a true neighborhood café rather than a place created exclusively for international visitors.
That local atmosphere was part of its appeal. We could walk in, sit down for breakfast and begin the day without first traveling into one of Osaka’s busiest commercial districts.
A Coffee Shop in Osaka That Opens Early
One of the most useful things about Coffee Market 145 was its early opening time.
Many of the independent restaurants and cafés we encountered during our Japan trip did not open until later in the morning. That can be inconvenient for travelers who wake up early, want breakfast before sightseeing or are still adjusting to the time difference.
Coffee Market 145 was open at 8:00 a.m., which made it a particularly useful option for us.
At the time of writing, the café is generally listed as open from 8:00 a.m. until 6:00 p.m., with Wednesday listed as its regular closing day. Business hours can change, so visitors should confirm the latest schedule through the café’s official website or social media before making a special trip.
Being able to sit down for coffee and breakfast at 8:00 a.m. gave us a much better start to the day than waiting for another restaurant to open or relying entirely on food from a convenience store.
Finally Finding a Good Cup of Coffee in Japan
Coffee is obviously subjective, but I had not been impressed by many of the cups I tried during the early portion of our trip.
Convenience stores were useful when we needed something quickly, but convenience was usually the main advantage. Tully’s and Starbucks provided familiar options, but I was looking for something that tasted more like it had been prepared by a local coffee shop that cared about the beans and brewing process.
In my experience, the best coffee we found in Japan usually came from smaller independent cafés.
Coffee Market 145 was one of those places.
The coffee had the flavor and strength I had been missing. Instead of simply drinking caffeine because I needed it, I could sit down and enjoy the cup.
That may not sound like a major vacation experience, but a good morning coffee can substantially improve a travel day. After several disappointing attempts elsewhere, Coffee Market 145 felt like a small victory.
“Allison and Ben enjoyed their breakfast. I was just happy to finally have a decent cup of coffee.”
The Coffee Market operates several related locations in Osaka’s Tennoji area, with coffee remaining central to each concept. Coffee Market 145 is positioned as a comfortable café intended to welcome people across different generations.
Breakfast and Food at Coffee Market 145
Coffee Market 145 is not only a place to order a drink. It also offers breakfast, baked goods and more substantial café meals.
The café is particularly associated with freshly baked creative bagels. Its official menu information also highlights breakfast toast served with handmade fruit jam, salads with house-made dressing and multigrain minestrone.
Allison and Ben both enjoyed the food they ordered during our visit. I was more focused on the coffee, but having a proper breakfast option made the café useful for the entire family.
This is important when traveling with people who have different priorities. One person may want specialty coffee, while someone else wants breakfast or something sweet. Coffee Market 145 gave everyone a reason to enjoy the stop.
The menu and prices may change, so check the current selections when visiting.
A Cozy Café With Natural Light
The interior of Coffee Market 145 felt bright, comfortable and relaxed.
Large windows allowed plenty of natural light into the space, which helped the café feel open without losing its cozy neighborhood atmosphere.
Some small cafés can feel cramped, particularly when travelers arrive with bags, jackets or camera equipment. Coffee Market 145 was more spacious than we expected. Current restaurant information lists approximately 42 seats, although the exact seating arrangement may change over time.
The combination of light, comfortable seating and a relatively calm morning atmosphere made it easy to settle in instead of immediately feeling pressure to finish and leave.
It was also a refreshing contrast to the crowded streets and heavily visited attractions that defined some of our other experiences in Osaka and Kyoto.
This was not a dramatic tourist destination. It was simply a pleasant local café that did its job well.
Warm and Welcoming Service
The staff were one of the best parts of our visit.
They were warm, patient and welcoming from the moment we entered. As international visitors with limited Japanese ability, we never felt as though we were creating an inconvenience.
That friendliness made the café easier to recommend. Good food and coffee matter, but the way a business makes visitors feel often determines whether they remember the experience positively.
Coffee Market 145 felt approachable. We did not need to understand an elaborate ordering ritual or feel intimidated about entering a small local business.
We were able to order, sit down and enjoy the morning.
What Was It Like Filming Inside an Osaka Café?
I also had a second reason for recording this visit.
I wanted to test what it would be like to film inside a Japanese restaurant or café.
Recording travel videos in public businesses can feel uncomfortable. I did not want to disrupt the staff, make other customers feel as though they were being filmed or create a problem simply because I wanted footage for YouTube.
Coffee Market 145 provided a low-pressure place to experiment. The café had good light, a comfortable layout and a relaxed atmosphere.
I tried to keep the camera focused on our table, food and drinks rather than other customers. That is a sensible approach in any restaurant, but it is particularly important in Japan, where people may place a high value on privacy.
My goal was not to turn breakfast into a large production. I wanted to document our experience while remaining respectful of the staff and everyone else in the café.
The visit showed me that filming inside a restaurant could work as long as I remained discreet, avoided capturing other guests and did not interfere with normal business.
Would We Recommend Coffee Market 145?
Yes. Coffee Market 145 is an easy recommendation for travelers staying near Momodani, Osaka’s Korea Town, Tennoji or other neighborhoods along the Osaka Loop Line.
It worked particularly well for us because it combined several practical advantages:
It opened early enough for breakfast.
It was close to Momodani Station.
The coffee was considerably better than the chain and convenience-store options I had been drinking.
Allison and Ben enjoyed their food.
The staff were friendly and welcoming.
The interior was comfortable and filled with natural light.
It felt like a neighborhood café rather than a heavily promoted tourist stop.
I would not suggest traveling across all of Osaka solely to drink one cup of coffee. However, anyone staying in or passing through Momodani should consider stopping at Coffee Market 145.
It gave us a good breakfast, a relaxing start to the morning and the first cup of coffee during the trip that I was genuinely excited to drink.
Coffee Market 145 Visitor Information
Location: Dogashiba, Tennoji Ward, Osaka
Nearest station: JR Momodani Station
Walking time: Approximately two to three minutes from the station
Typical listed hours: 8:00 a.m.–6:00 p.m.
Typical closing day: Wednesday
Food: Breakfast, bagels, cakes, toast, salads and café meals
Other features: Takeout, non-smoking interior and nearby paid parking
Business hours, menu items and operating policies can change. Confirm the current information directly with the café before visiting.
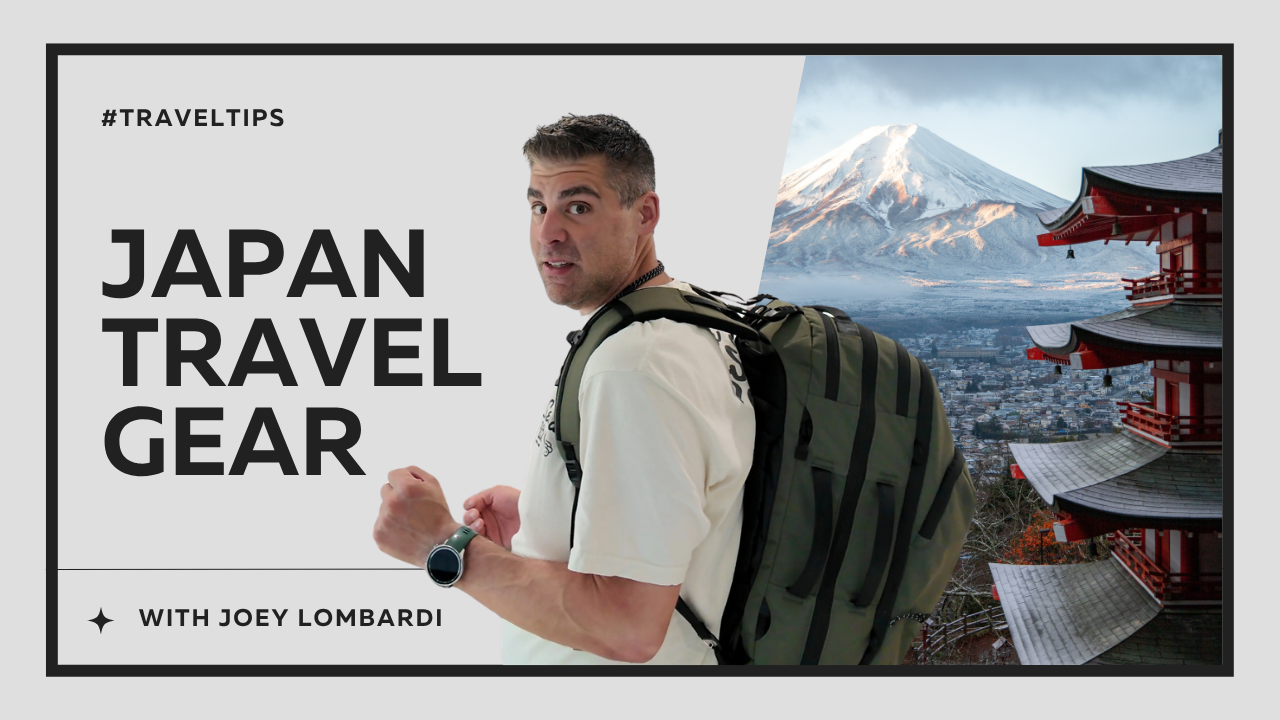
Planning a trip to Japan is an incredibly exciting venture, but deciding what to pack can quickly become overwhelming. From navigating bustling train stations to preparing for the intense humidity of a Japanese summer, your gear choices can truly make or break your travel experience.
I am breaking down my entire minimalist, one-bag travel gear setup filmed completely prior to my departure. Because staying mobile is my top priority, I am pulling back the curtain on the exact strategy and justification behind every single item in my bag. Plus, I will share a few critical, lesser-known Japan transit tips that will save you massive headaches on arrival.
Want to see how I pack every item and hear the full strategic breakdown? Watch the detailed video below:
The One-Bag Travel Philosophy: Why I Ditched Roller Bags
When you picture traveling abroad, you might automatically think of rolling a massive suitcase behind you. However, for a multi-city trip through Japan, traditional rolling luggage can actually be a major liability.
Japan’s transit system is world-class, but navigating crowded train platforms, endless flights of subway stairs, and narrow, cobblestone streets with a bulky roller bag is exhausting. By committing to a minimalist, carry-on-only backpack setup, you maintain total mobility, hands-free flexibility, and can easily bypass the hassle of coin lockers or luggage forwarding services.
🚨 Critical Japan Tip: The Android vs. Apple Transit Card Trap
If you plan to use digital IC transit cards (like Suica or Pasmo) on your phone, your ecosystem matters. Apple iPhone users can seamlessly add and top up these cards directly within Apple Wallet.
However, if you have an Android phone purchased outside of Japan, it likely lacks the specialized Osaifu-Keitai (Felica) chip required to run digital transit cards. If you are an Android user, prepare ahead of time to purchase a physical welcome card at the airport instead!
The Bag System: Pakt 35L & Alpaka Bravo 8L
To pull off seamless carry-on travel, I rely on a highly efficient two-bag workflow consisting of a primary travel pack and a dedicated daily carry sling:
Primary Pack: The Pakt 35L Travel Bag – This pack acts as my portable closet. It opens flat like a suitcase, making organization incredibly simple, while still fitting perfectly into airline overhead compartments. 👉 Get the Pakt 35L Travel Bag Here
Day Bag: The Alpaka Bravo 8L Sling – Once I arrive at my accommodations, the main pack stays behind, and the Alpaka sling becomes my daily companion. It is just the right size to securely hold my wallet, passport, phone, and camera gear while exploring. 👉 Get the Alpaka Bravo 8L Sling Here
Clothing Strategy: Surviving the Japanese Summer
If you are traveling during the warmer months, packing light requires smart fabric choices. To minimize bulk, I pack a limited rotation of high-quality **Merino Wool shirts and socks**.
Merino wool is a literal superpower for travel; it naturally regulates body temperature, breathes exceptionally well, and features built-in odor control. This allows you to wear garments multiple times between washes, cutting your total clothing packing list entirely in half.
The Electronics Setup: 100% USB-C Ecosystem
Nothing weighs a tech bag down faster than a tangled mess of proprietary power bricks and cables. To combat this, my entire electronics rig is built strictly around the **USB-C standard**.
From my camera gear down to my personal grooming items—including my electric shaving device and toothbrush—everything charges via a single uniform cable. To power it all, I carry a single 200W charging brick capable of charging my laptop, phone, and accessories simultaneously from a single wall outlet.
What’s Next? The Post-Mortem Analysis
Because this packing list was put together completely prior to the trip, it represents the ultimate theoretical layout. Once I return, I will be publishing a complete post-mortem analysis to review what items were absolutely essential, what went unused, and how the gear actually held up under the pressure of real-world travel.
Are you planning a trip to Japan? What is the one piece of travel gear you absolutely cannot live without? Let me know in the comments below!